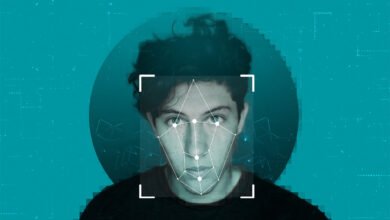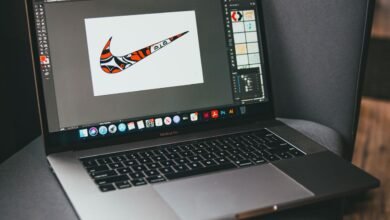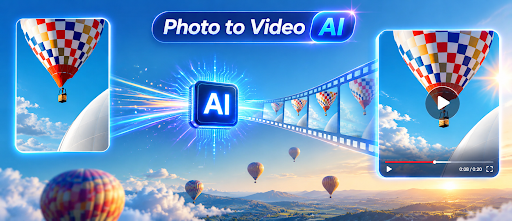
A strong photograph can capture a moment, but it cannot show hair moving in the wind, a camera slowly approaching a product, or light changing across a landscape. Traditionally, adding that kind of motion required video footage, editing software, keyframes, and considerable production time. AI image-to-video tools offer a more accessible alternative: upload a still image, describe the movement, and let a video model generate the frames between the beginning and end of the shot.
That accessibility explains the growing interest in the phrase “photo to video ai free.” Creators are not simply looking for another slideshow maker. They want a practical way to animate the actual subject inside a photograph without paying for a shoot before they know whether the idea will work.
For anyone evaluating this workflow, photo to video ai free provides an online starting point with 60 registration credits. A free account and sign-in are required, but no credit card is needed. The generator accepts common image formats, provides several video-model choices, displays the credit cost before generation, and produces a downloadable MP4.
What Does Photo-to-Video AI Actually Do?
A slideshow tool moves between separate photos with pans, zooms, and transitions. An AI image-to-video generator works differently. It treats the uploaded photograph as a visual reference and synthesizes new frames in which the subject, camera, or environment appears to move.
The source image supplies the face, product, object, color palette, and composition. Your prompt can then describe what changes over time. For example:
The woman makes a subtle head turn as a soft breeze moves her hair. The camera slowly pushes in, with warm afternoon light and restrained natural motion.
This is more useful than repeating details already visible in the photograph. The model can see the person and background; what it needs from you is direction about motion, camera behavior, pacing, and atmosphere.
The platform’s image-to-video workflow requires an image, while the motion prompt is optional at the form level. If you leave it blank, the selected model may infer movement from the uploaded image. A focused prompt, however, usually gives you more control.
How to Use a Photo to Video AI Free Workflow
Step 1: Create an Account and Review the Free-Credit Terms
Begin by creating a free account and signing in. New accounts receive 60 credits without requiring a payment card. These credits are intended to let users evaluate an initial generation.
Free-credit videos include a small watermark. Paid plans provide watermark-free output and commercial-use benefits. Therefore, the free option is best treated as a genuine evaluation workflow rather than a promise of unlimited production.
The number of credits required is not fixed across every job. It changes according to the selected model and parameters. The interface updates the cost before you generate, allowing you to compare settings before committing credits. If a generation job fails, the charged credits are returned automatically.
Step 2: Upload a Suitable Source Image
The generator accepts JPG, PNG, and WEBP images. For more predictable results, choose a sharp, well-lit photograph with one clearly recognizable subject. Portraits, product photographs, landscapes, illustrations, and AI-generated artwork can all be used.
Avoid beginning with a heavily compressed image, severe motion blur, a blocked face, or a crowded scene containing several equally prominent subjects. The model has to infer depth, object boundaries, and possible movement from a single frame. Clean visual information gives it a better foundation.
If you are animating a product, keep its important edges, logo, and surface details visible. If you are working with a portrait, choose an image in which the eyes, facial outline, and hair are readable. AI can generate motion, but it cannot recover reliable details that are absent from the source.
Step 3: Describe Motion Instead of Rewriting the Image
A useful prompt can be organized into three parts:
- Subject movement: “gentle head turn,” “fabric sways,” or “the car moves forward.”
- Camera movement: “slow push-in,” “smooth orbit,” or “pan from left to right.”
- Atmosphere: “soft breeze,” “light rain,” or “golden-hour light gradually brightens.”
A concise prompt such as “subtle head turn, slow camera push-in, soft breeze” is often more controllable than a long request containing several actions, scene changes, cuts, and effects.
When a face, logo, text element, or product shape begins to drift, reduce the amount of motion. Ask for one main action and one restrained camera movement. Change one phrase at a time between generations so you can identify which instruction improved or destabilized the result.
Step 4: Choose a Model and Its Supported Parameters
Photo to Video AI uses a model-based workspace rather than applying one universal set of controls to every generation. The image-to-video entry defaults to Veo 3.1 Fast, while the available selector also includes model families such as Kling and Seedance. Not every model supports the same duration, resolution, aspect ratio, sound, or frame controls.
The current configurations illustrate those differences:
- Veo 3.1 Fast offers 4-, 6-, and 8-second duration choices with Auto, 16:9, and 9:16 ratio controls. Its reference-to-video path is limited to eight seconds when reference images are used.
- Kling 3.0 supports durations from 3 to 15 seconds, 16:9, 9:16, and 1:1 output, optional generated sound, and Standard, Professional, or 4K modes. When an uploaded image acts as the first frame, the output ratio follows that image.
- Seedance 1.5 Pro provides 4-, 8-, and 12-second choices; 480p, 720p, and 1080p resolution options; and ratios including 1:1, 4:3, 3:4, 16:9, 9:16, and 21:9. It also includes audio on/off and dynamic-versus-locked camera controls.
These parameters should be treated as model-specific choices, not universal promises. Check the live form because the supported options and credit cost update with the active model.
For early experimentation, choose the lowest-cost valid settings. A short preview is enough to test whether the subject remains recognizable and whether the requested motion is working. Increase quality only after the creative direction is stable.
Step 5: Generate, Review, and Download the MP4
After choosing the model and settings, review the displayed credit requirement and start the generation. Processing usually takes minutes rather than requiring a traditional editing pipeline.
When the MP4 is ready, inspect more than the first frame. Look closely at faces, hands, lettering, logos, product geometry, reflections, and background edges throughout the clip. If the result is unstable, simplify the prompt or reduce the motion before generating another variation.
Once satisfied, download the MP4. Choose a platform-appropriate format: 9:16 for TikTok, Instagram Reels, and YouTube Shorts; 16:9 for YouTube, presentations, and display advertising; or 1:1 for product pages and social carousels when the selected model supports it.
Practical Ways to Use Photo-to-Video AI
E-commerce teams can turn an existing product image into a short reveal, floating presentation, zoom-in, or atmospheric showcase. This makes it possible to test video concepts without arranging a new shoot for every product or campaign variation.
Social creators can convert portraits and artwork into vertical clips with gentle expression changes, hair movement, lighting transitions, or camera motion. Restrained movement is especially important for keeping faces recognizable.
Marketers can create short assets for landing pages, ads, and email campaigns from approved brand photography. One source photograph can also be tested through different models and prompts to find the most suitable motion treatment.
Personal users can animate travel photographs, landscapes, illustrations, or family portraits. For meaningful personal images, subtle animation is usually more convincing than dramatic movement.
Common Mistakes to Avoid
The first mistake is asking for too much at once. A short AI video is better suited to one continuous shot than several unrelated actions.
The second is selecting the highest resolution immediately. Higher settings may cost more, but they cannot repair an unclear image or a confused prompt. Validate the movement first.
The third is ignoring the destination platform. A landscape composition may lose its subject when forced into a vertical post. Select the final ratio early or start with a source image composed for that format.
Finally, do not assume “free” means anonymous, unlimited, watermark-free commercial generation. The current free workflow requires an account, includes 60 evaluation credits, and applies a watermark. That transparency makes it easier to decide whether the results justify moving to a paid plan.
Final Thoughts
A photo to video ai free tool is most valuable as a fast creative testing environment. It lets you find out whether a still photograph can support believable motion before investing in a larger production workflow.
The best results do not come from the longest prompt or the most expensive setting. They begin with a clear image, one understandable motion idea, a model suited to the required format, and careful review of the generated MP4. Used that way, photo-to-video AI can turn existing visual libraries into practical short-form video assets without demanding traditional editing skills.